I first met Josh Swanson a few years ago during my second season deployed to McMurdo Station, Antarctica. It was my first time spending a winter isolated in the dark, while he was on his 8th (yes, you read that right). Now he has 16 Antarctic seasons under his belt (11 of them winters) and he still hasn’t lost his love for the seventh continent. Swanson is a staple in Antarctica, even having joined in on the most remote photowalk in the world. If you’ve seen the award-winning documentary “A Year On Ice,” his may already be a familiar face; he makes a cameo about halfway through the film.
He currently works as a lineman at McMurdo Station, which is arguably one of the most important jobs at the station. His work prevents a large scale extended power outage that could spell doom for the scientists and contract workers living and working in the unforgivable environment.
Swanson is a tall, strong, quiet man who is almost always seen donning his standard attire: suspenders, plaid shirt and a respectable beard. He could easily pass as a lumberjack or star in a live action film about Paul Bunyan. Instead, this Minnesota native spends his free time toting around his camera and tripod, consistently capturing some of the most amazing night shots I’ve seen come out of this frigid slice of the world. While most who photograph the dark skies of the Antarctic winter focus entirely on the dramatic stars and glistening auroras, Josh combines those elements with some of the most iconic landmarks on Ross Island. Whether they feature the still standing huts from Antarctica’s earliest explorers or sculptures fabricated out of scrap metal, his images encompass a complete picture of living hrough the long night of an Antarctic research base deep in the heart of winter.
I recently caught up with Swanson via email (since he is still at McMurdo and external communication can be difficult) and he was kind enough to share some of his favorite images and tips with Resource Travel.
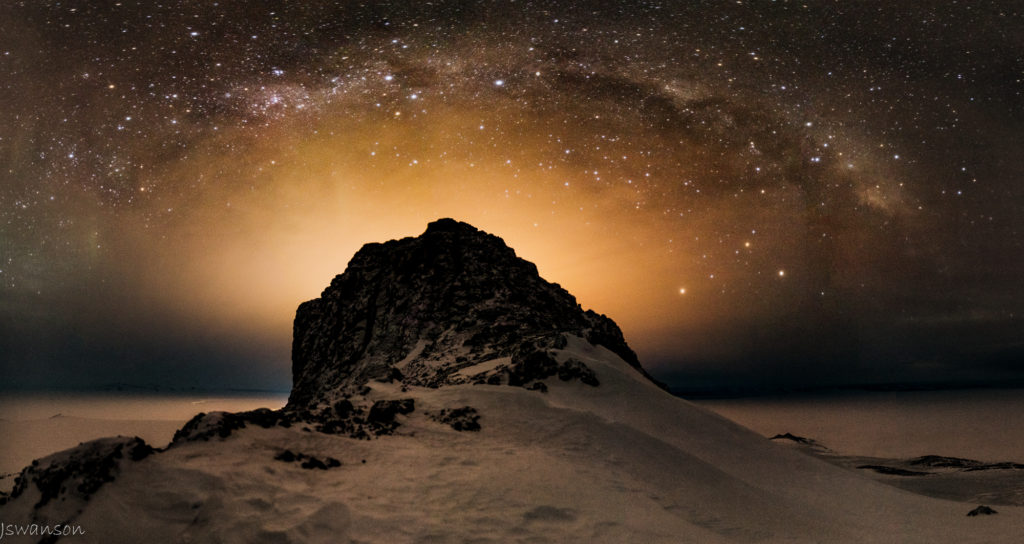
June 4th 2016 This was an over cast day but light enough to see the stars. Castle Rock, a large rock formation a few miles away from the station is in the foreground, backlight by McMurdo stations lights in the distance.
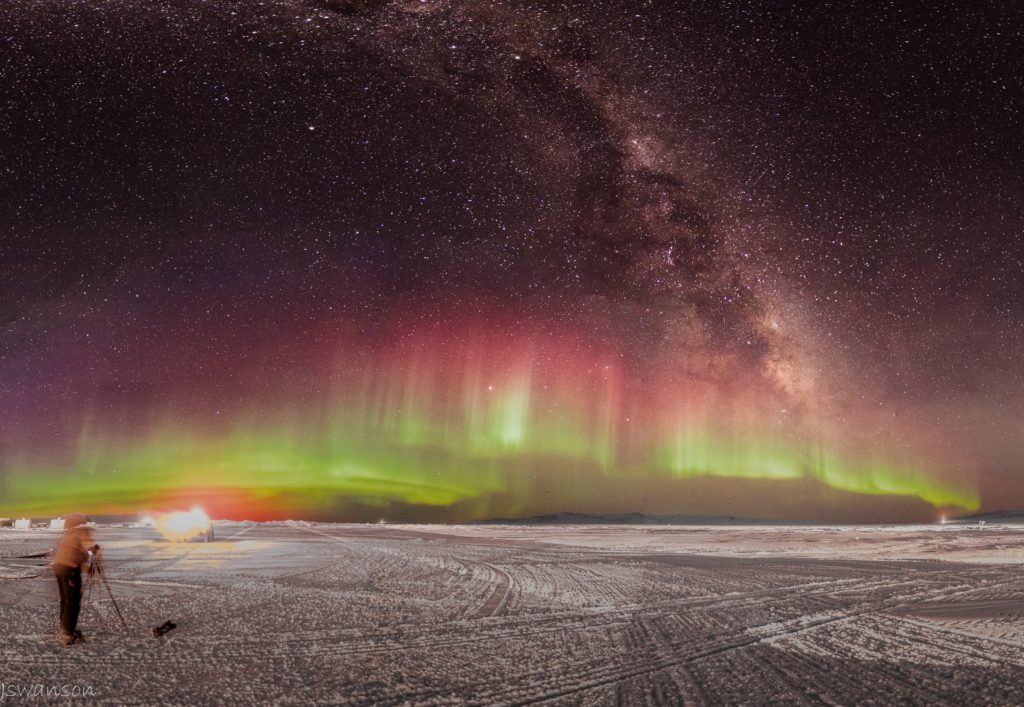
Auroras are best seen and photographed away from the lights of McMurdo station, this shot was taken several miles away from base on the permanent ice shelf near the groomed ice runway. You can see Ross Island in the distance and several lights from work vehicles going about their business
Tell us a bit about yourself and how you ended up in Antarctica.
I was born and raised in Rochester Minnesota and ended up on the ice by chance. I graduated a high voltage lineman course at Dakota County Tech. in Rosemount Minnesota in 1998. The U.S. Antarctic Program was looking for an apprentice lineman and they had previous success with graduates of that course. They contacted my school and I landed an interview. It mostly consisted of them asking me questions about line work and myself asking about snowboarding opportunities in Antarctica. I headed to McMurdo station for the first time in October 1999 for the austral summer season. Since then I have completed 5 summer seasons and 11 winters.
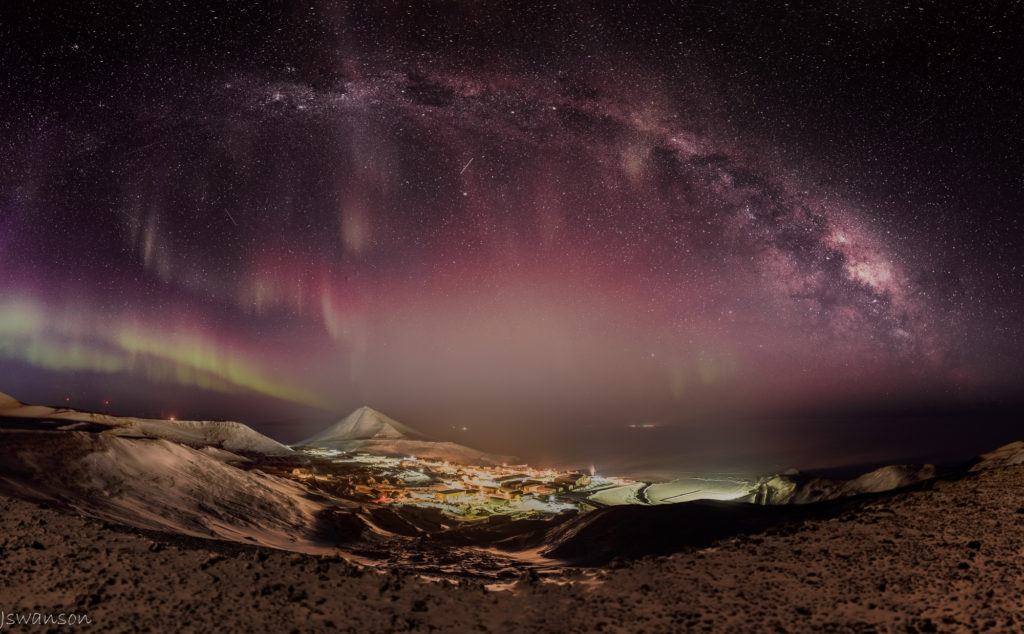
June 7 2016. This is a HDR mosiac panoramic. 39 exposures taken to pull this off. This overlooks McMurdo Station with dancing auroras overhead. In the distance, Pegasus and Phoenix airfields lights are visible on the ice shelf.
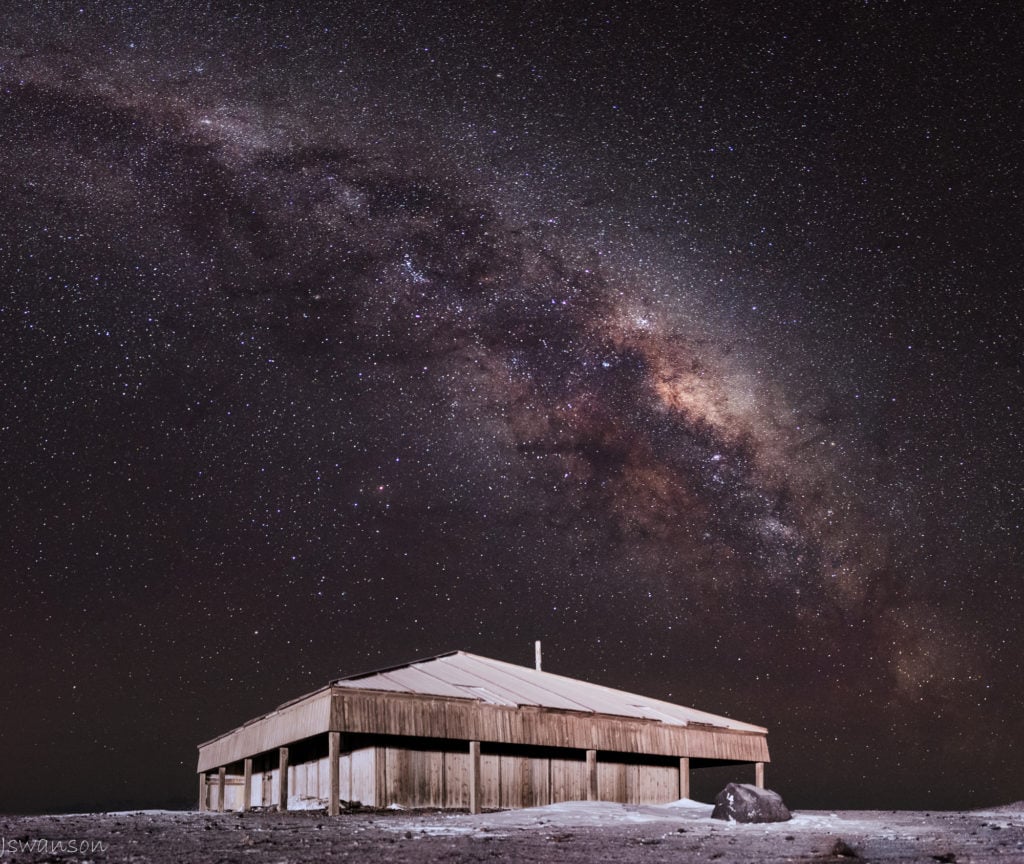
August 7 2015. This was taken at 3am. I used stellarium to know when the Milky Way would be in this location. Robert Falcon Scott and his crew built this hut during their 1901-1904 expedition and it remains full of artifacts to this day.
Were you interested in photography before you started working in Antarctica?
My first season on the ice, I believe all pictures I took were taken with a disposable film camera. My father was and still is very into photography. So I was around it and dabbled with it in the film days with but it never took hold.
In January of 2015, My wife Megan and I were on a trip in northern Minnesota when I really wished I had something better than my camera phone. So I purchased a Nikon D7100, a Nikkor 18-140mm and a Sigma 8-16mm. By the time I headed down that year for my 10th winter in Antarctica, I had a basic knowledge of camera settings but had no clue how to process my images. That winter, with the help of the McMurdo Photoclub and how-to videos and tutorials on the internet I started to improve both my photography as well as my use of Lightroom and Photoshop. My main method was no to try to learn it all at once but to learn a method, apply it then move on to something else.
Last year I ran into alignment issues when taking panoramic images. Hand rails and some other objects didn’t always align correctly. Special brackets are made to go on the tripod to avoid this, commonly called nodal rails, no parallax brackets, but being on the ice I was not able to get one (planes don’t regularly arrive during the winter which means no mail service). I ended up just building one. It worked for the season, although I later replaced it with a manufactured one for that had degree increments etc. for faster more accurate pans.
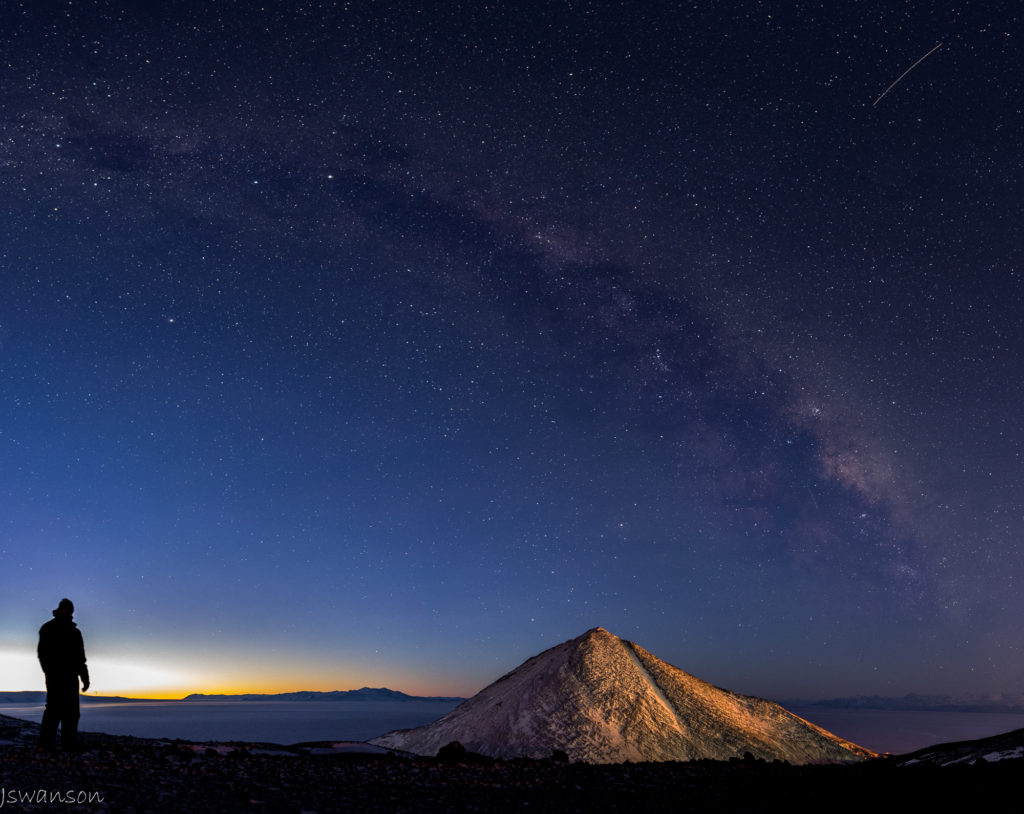
September 14, 2015. The sun slowly returns to McMurdo. During this time it can be very windy and we dub the season Winfly. This is a 2 row panoramic taken at half past 3am. Observation Hill can be seen lit up by the lights of McMurdo while the Royal Society Range is in the far off distance.
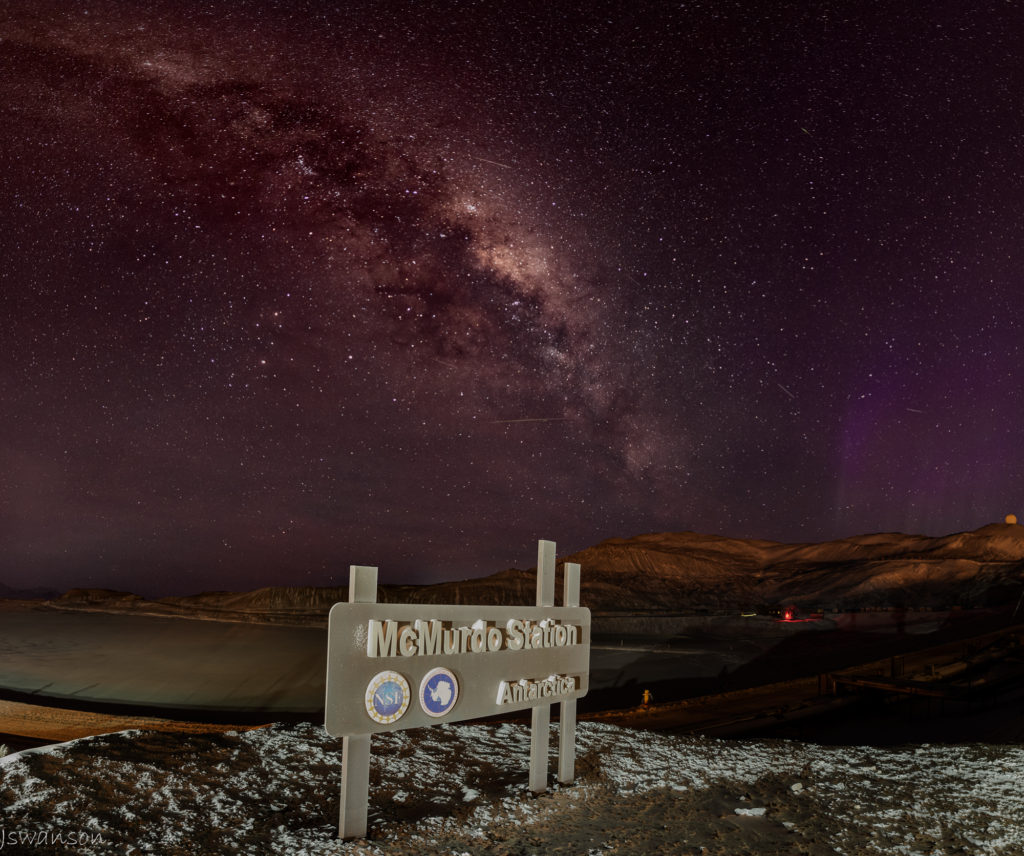
May 4th 2016. This was a tough shot for me as the sign is in McMurdo station and safety lights are all around which made it difficult to capture the sky. This is a mosiac panoramic as well and required 20 exposures.
Are there any modifications to your shooting style that you have adopted to get these shots in such a harsh environment?
My D7100 LCD screen likes to freeze inoperable in the cold but work again when warm. I used to use live view to focus on the stars so that was an issue. Now I mark the lens to know the focus point since I cannot rely on the live view. Battery life also shortens with the cold. I have started using a larger external battery I keep in an insulated bag strapped to the tripod and I have added hand warmers on very cold days. My D810 hasn’t had an issue yet with the screen going inoperable in the cold, even at -40f ambient.
Once the camera gets cold, I leave it that way until I am done shooting. Warming it up causes condensation to form on the sensor and internals of the lens, making for poor images till evaporated. I haven’t had an issue after fully warmed up, likely due to how dry it is here. I also use moisture absorbing dry-packs to help out while it is warming up.
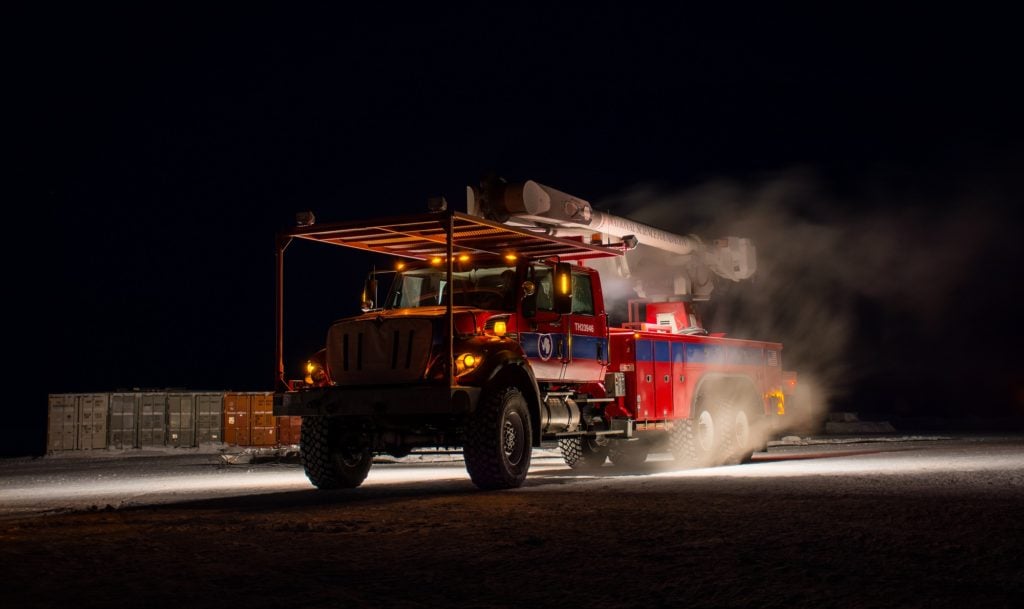
July 11 2015. We (the linemen) had some aerial work to do at Pegasus airfield, which is located miles away from station on the permanent Ross Ice Shelf. This is an HDR image of our work truck. We call it New Hottness.
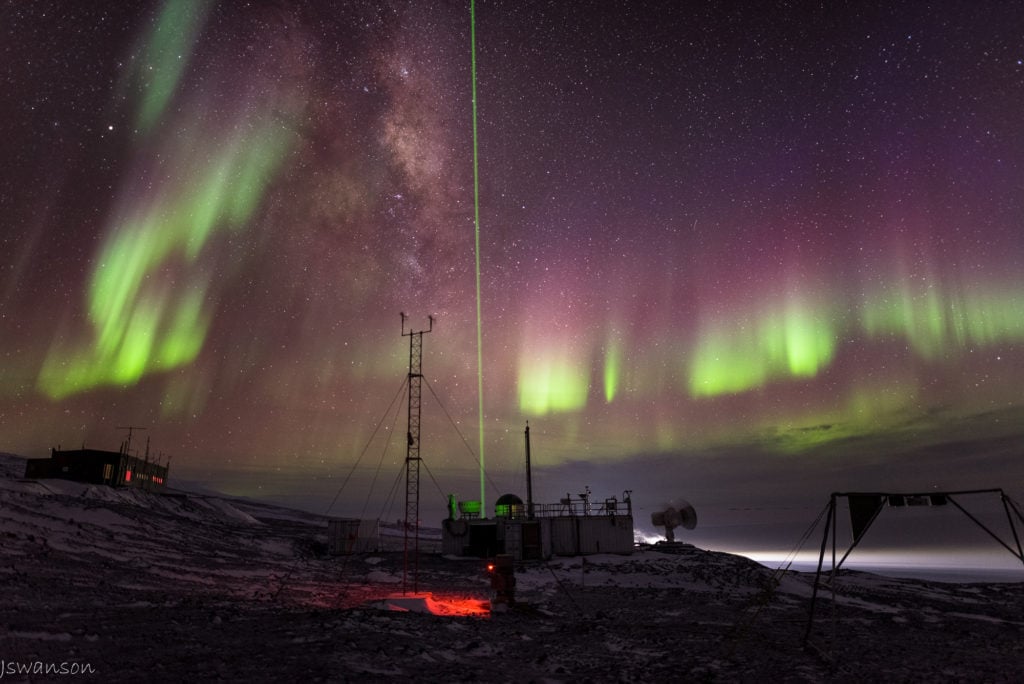
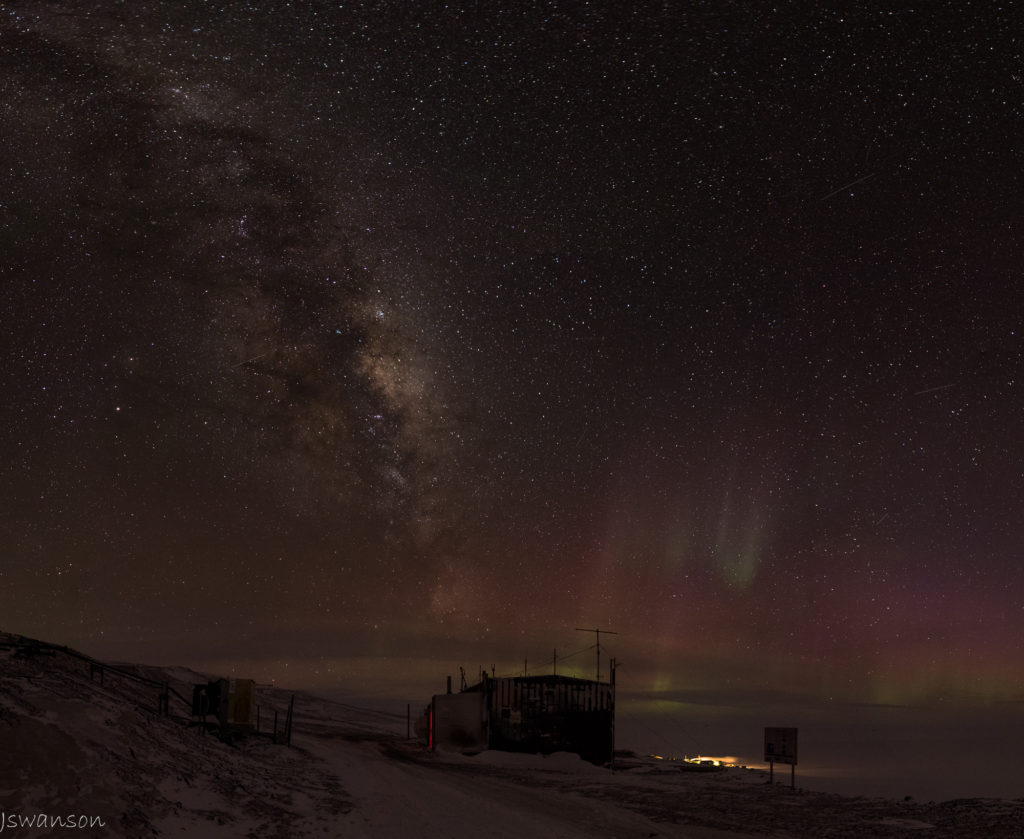
April 7, 2016. This is a single image from a time-lapse series. I headed out to grab photos of this site with the Milky Way positioned above and was rewarded with Aurora Australis activity. This includes the A.W.A.R.E site and COSRAY, two scientific projects collecting data in the area.
How did your photography portfolio end up full of astrophotography and panoramas? Was it an intentional choice to focus on those genres?
Landscape was the focus starting out and then it progressed. Panorama came quickly as I always seem to want more in the image than my lens allows. I pan here in Antarctica far far more than I do elsewhere. Antarctica has a lot going on in a crazy wide field of view. Also, as the sky darkens in winter I am always able to find something interesting in the sky, most often it’s the Milky Way and/or Aurora activity.
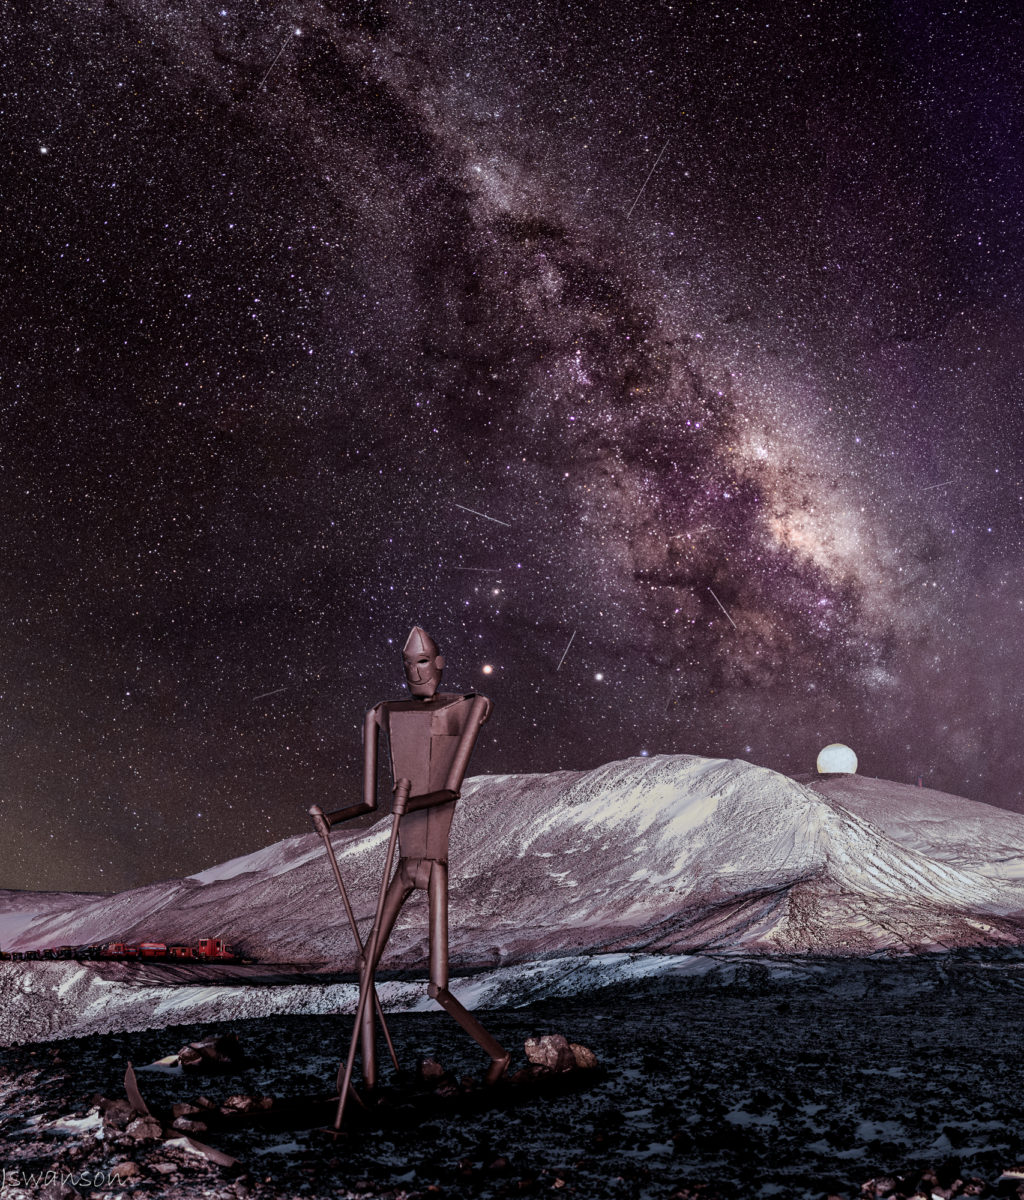
April 17, 2016. “The Skier” is one of a number of scrap metal art sculptures found around McMurdo Station. He stands roughly 6ft high. This is a mosiac as I used iso 3200 for the sky and iso 400 for the landscape. The multiple light trails in the sky are from polar orbiting satellites that transmit their data down to the giant antenna on the hill in the background (covered by a protective white dome).
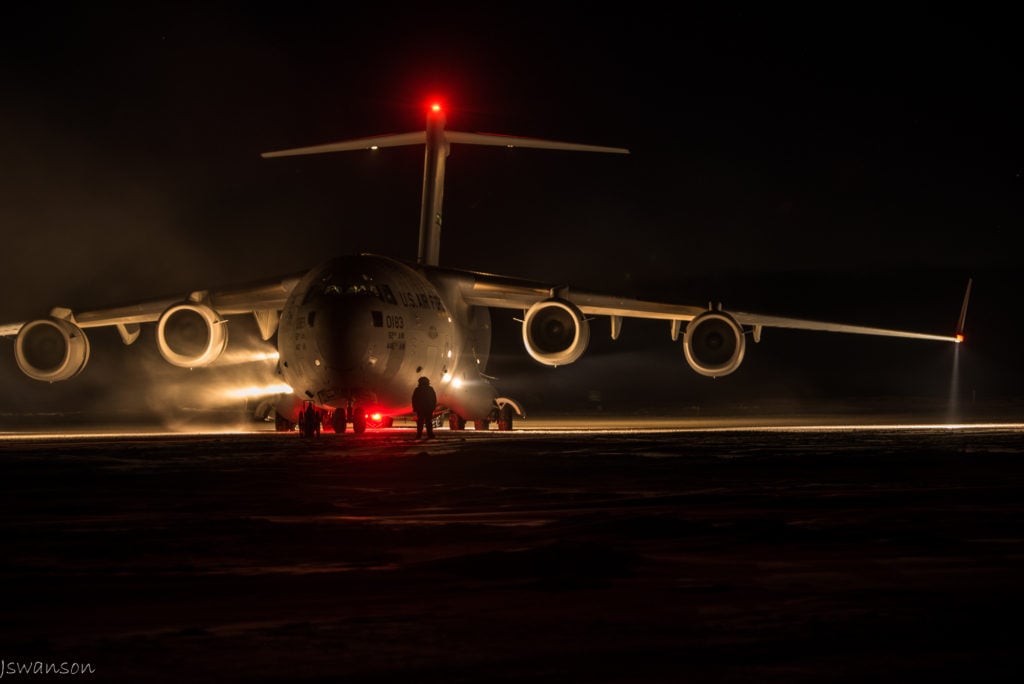
June 8th, 2016. The C-17 military aircraft arrived with cargo, fresh fruits, veggies, mail and a few new people. Temps were in the -40f ambient with some mild winds.
So many of your shots are taken in the early morning hours and in some of the areas of McMurdo that don’t have warm buildings to retreat to. What motivates you to get out there and shoot in these conditions?
Motivation is to get a shot I haven’t seen before and maybe no one else has either. This can mean a location someone hasn’t been to, which around McMurdo can be very hard to do. But it can also mean a view many see, but with something different. I am guilty of making that “something different” be the Milky Way. I will use a star chart tracking software to know when the Milky Way will be where I want it for a shoot and then I just need the weather to comply, many times those two things align at weird hours like 2am. There is also always the chance for auroras which you never want to miss.
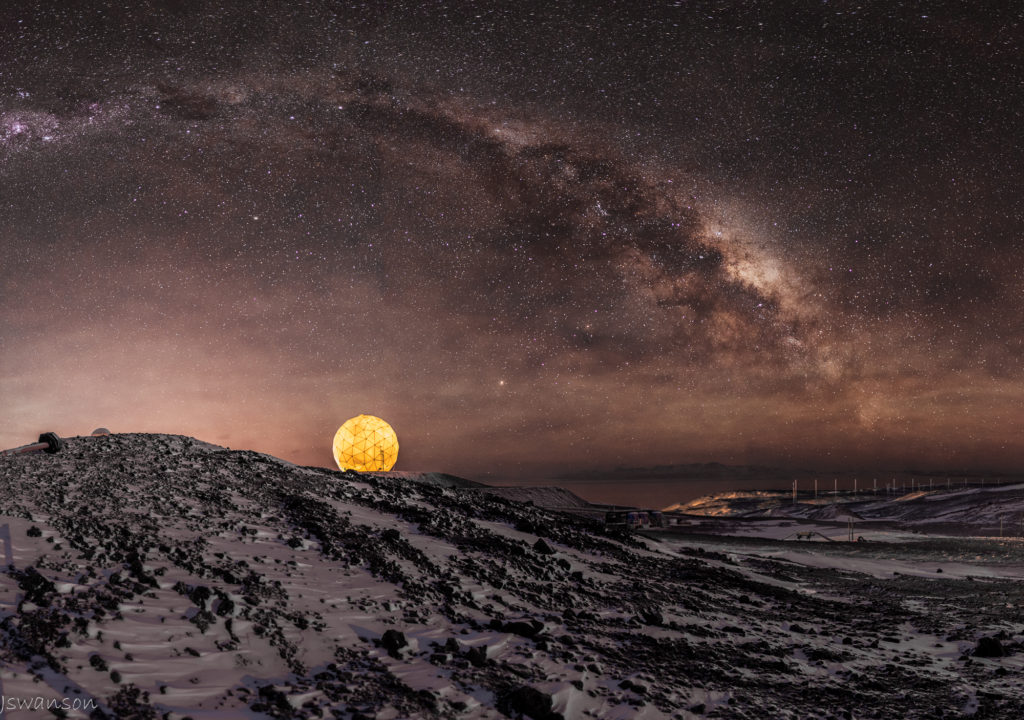
June 6th, 2016. A mosiac panoramic with 18 exposures. McMurdo is to the left and below (out of frame). The NASA satellite tracking dish is housed in the dome and to the right is the SuperD.A.R.N aurora measuring site.
Any advice for people who want to get these stunning milky way images in places other than Antarctica?
Light pollution is the biggest enemy for seeing the Milky Way. If you are in a city, the light is likely too strong and travel will be required. I keep shooting for the Milky Way even into light pollution just to see if I can pull it off. I fail a lot but now and then something works. I am of the mind better to try and fail than to not have tried. There are light pollution maps on the internet that you can look at to find dark skies near your area.
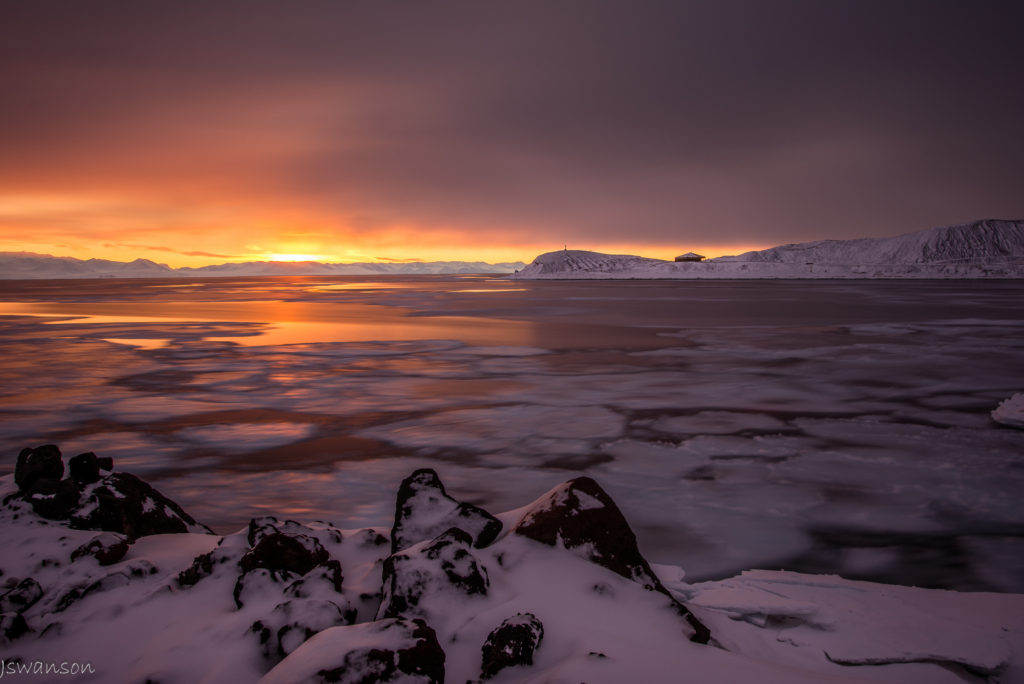
March 24, 2016. This is a fun time of year. The sun is setting and the bay is open but fighting with the wind to ice over. With ND filter I did two long exposures 1 focused on Scott’s Hut (in the distance) and the other focused on the rocks.
Any tips for cold weather photographers?
Dress warm and in layers. A thin base layer works best to wick away moisture and keep you warm. It took me a long time to learn that if my hands/feet are cold I need more insulation over my legs/arms, not thicker gloves or boots. Keep the blood lines to the extremities warm and your hands/feet stay warmer.
As for the camera gear, most modern DSLRs seem to do pretty well. Batteries die faster. The original internal batteries workable, until you get into 5 minute exposures or multiple hour time lapses. However, I am having great life from the larger remote external pack.
Also, make sure to have as much of your gear setup and ready to go before heading out, it is always better to have less to do in the cold.
Once the camera is cold, warming it up can cause moisture to form on the sensor or lens and cause poor images to be taken afterward. I only warm the camera up after shooting.
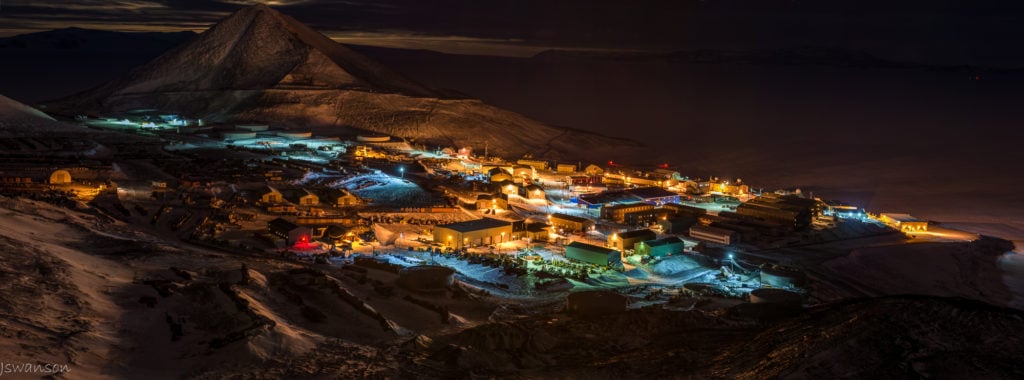
June 6, 2015. This was taken shortly after a scheduled plane arrived. I just received my Tamron 70-200 on the flight and this is one of the first images I took with it. A HDR panoramic of McMurdo station.
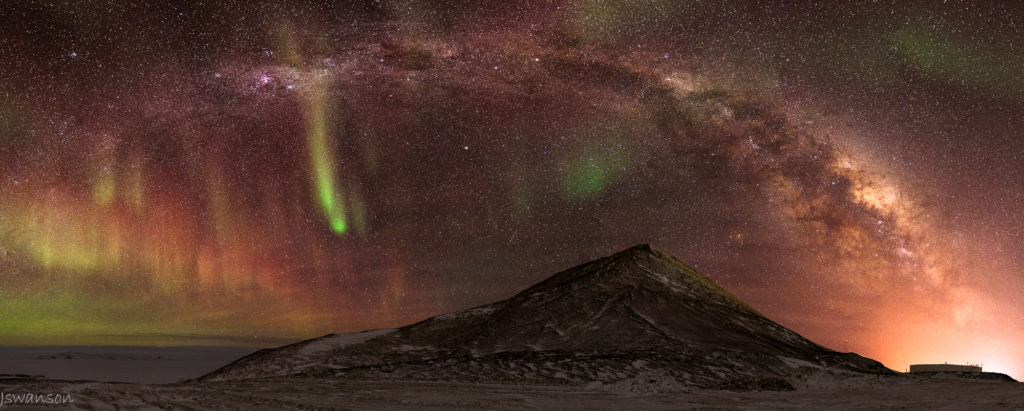
August 12, 2015. I had this shot in mind and found that the milky way would be in alignment at 2am. I was awarded with aurora activity as well. I remember this being an extremely cold and windy early morning, but so worth it.
How do you inspire yourself to get outside and shoot on the days that you really want to just stay inside and stay warm?
Knowing that I won’t get the shot if I stay inside. That said, I am human and have opted to stay inside, often to later see images from someone who didn’t and ended up with a great shot. This drives my motivation to not stay inside next time.
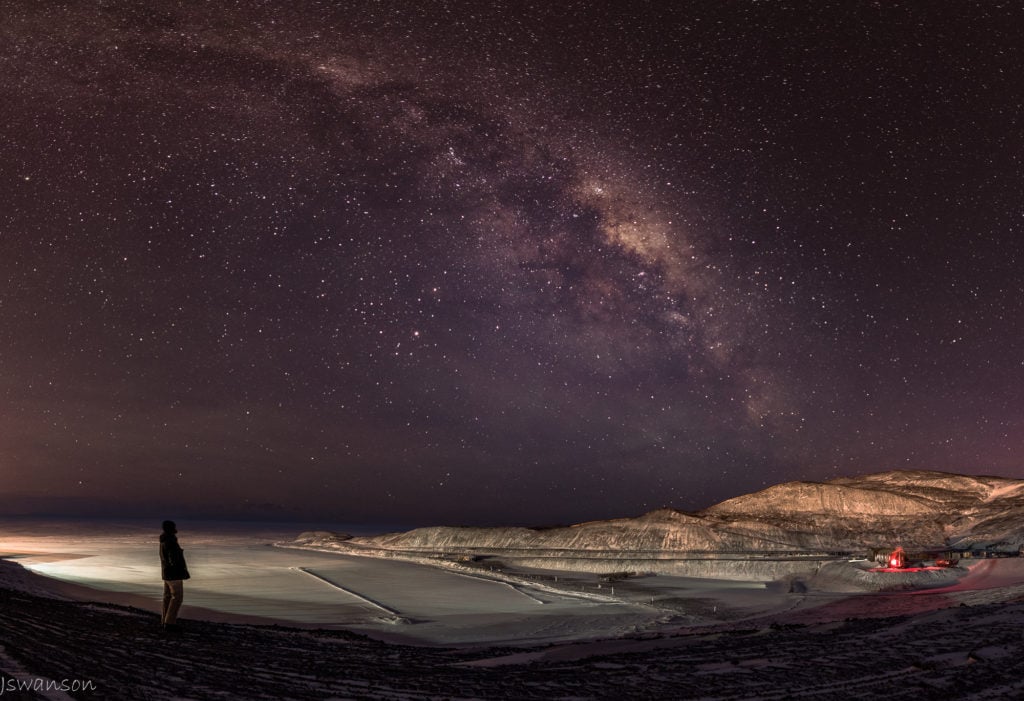
May 8, 2016. This is a Mosiac panoramic with 17 exposures. The shot over looks McMurdo bay. Hut Point is in the distance which is home to Robert Falcon Scott’s Hut . On the ice, you can see the ice pier (used to unload the annual supply tanker) is in the very early stages of being built.
What is your favorite aspect about shooting in Antarctica?
I have enjoyed the Antarctic from my first season in 1999. Getting very involved in photography came much later. I very much enjoy shooting here and pushing my ability further, especially when I can show the magic this place has. I am excited that people enjoy the images and I strive to continue and improve. So, I would say being able to share the beauty of a very remote location that most of the world will never see in person is my favorite aspect about photographing Antarctica.
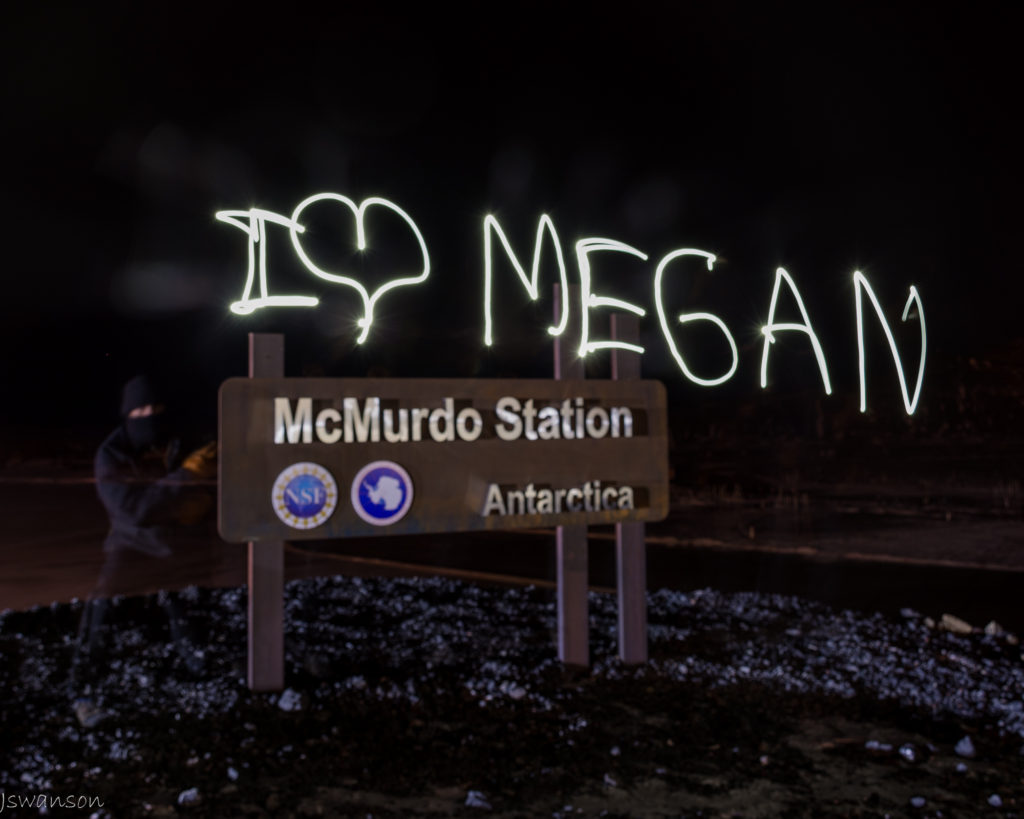
June 13, 2015. The weekly task for photoclub was to try out light painting. 60 second exposure,I used my phone flash as a flash light to write my message and then stood by the sign for the remaining exposure time. Since mail is difficult to send and receive during the winter, it is common for people deployed to send our loved ones “photocards” instead of postcards.
What do you have planned next, both for your photography as well as yourself?
My wife Megan and I plan to meet in New Zealand when my current season is complete. I am very excited to spend time with her there and hopefully she will put up with me taking some landscape images. She and I both ride motorcycles and so we are hoping to get in some good miles during the off season as well. Apparently, I have a lot of chores to do at the house. I also plan to capture some images with my father when able, we have some waterfalls to visit.
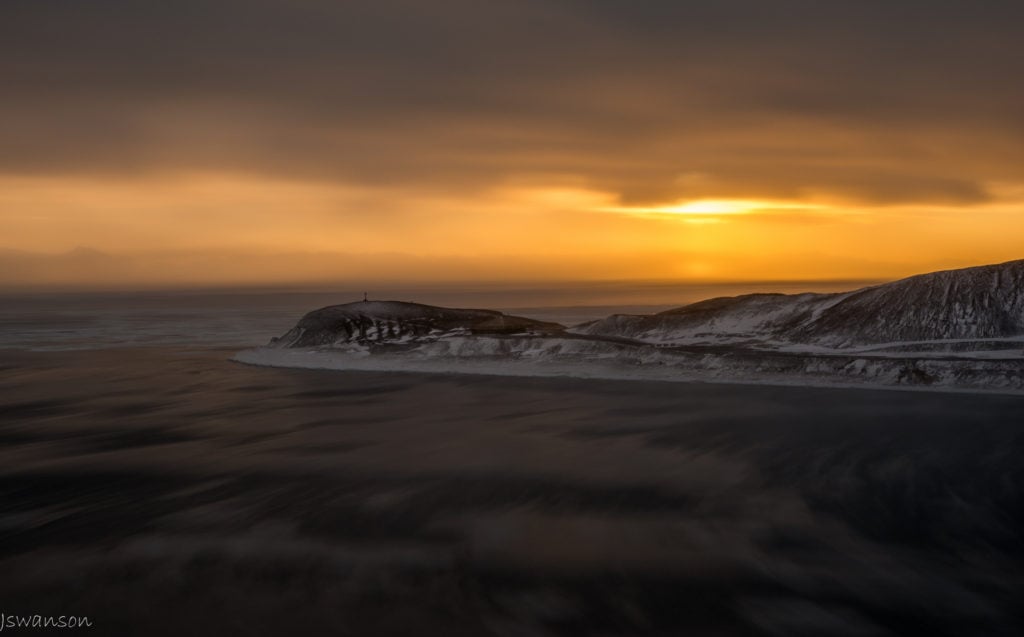
March 20th, 2016. The bay near station had started to form ice that was then broken into chunks as the winds picked up and the tide came in. This was a very windy day. A ND filter was used to extend the exposure to 80 seconds.
Can you explain your photo taking process in depth (include camera gear, setting recommendations, exposures etc.) What goes into editing a panorama with multiple exposures?
As anything, it varies. But when it comes to landscape Milky Way shots, I almost always want more in the scene than my lens gives me alone. So here in the Antarctic, I almost always have a no parallax/nodal bracket on the tripod. Currently, I am doing what some call a mosaic astro-landscape. I usually get inspiration for a shot ahead of time so have the general shot placement figured out and I am waiting for a clear sky at the given time the heart of the Milky Way will be where I want it. Sometimes Aurora activity is going on as well…no way to plan that though.
You asked for depth, so here goes:
- I use a DSLR camera capable of iso-3200, fast lens, programmable remote shutter, tripod, multi-row no parallax bracket, ball head, headlamp and lately have been using a larger external battery to power the camera body.
- I will set the white balance manually so each image is the same and I will change in post if desired. This helps each image to look the same color- and exposure-wise from frame to frame. Mine is set to 5600k. The D810 has an electronic front curtain so I use that as well. On both the D7100 and D810 I utilize the mirror up function. I shoot manual mode for these types of shots so exposure stays the same frame to frame. It is recommended with long exposures to cover the eye piece as light can/will bleed through it, changing the exposure of the image. The D810 has a built-in flip switch. The D7100 has an available plastic cover, but I just use a piece of electrical tape.
- Using the ball head (any head will work) I level the panning base. This way as I pan, the camera stays level. My homemade bracket didn’t have a pan base so had to level the head by using the tripod legs. It works, but it’s time-consuming.
- If possible, I will use live view and watch the scene to see if something doesn’t look right and another angle would be better. Having a large aperture opening of f1.4 helps a lot but in the very dark locations, it is still a black screen.
- For the mosaic, I will do two identical pans but with a different focal point, ISO setting and f-stop. I then combine the two panned images in Photoshop to create one image.
- For one pan I will focus on a star using live view (unless it is inoperable). This works best with an aperture F2.8 or larger. I use F1.4 on the 20mm lens. I get a bright star in the center of the frame, zoom in on the live screen and focus until it is the smallest dot.
- With my 20mm lens, I shoot it wide open at F1.4, ISO 3200 and a 10-second exposure. I overlap each frame roughly by ½ . The reason is that my 20mm F1.4 suffers from chromatic aberration in the edges. More overlap cleans that up when merged. So I also over shoot my scene so there’s less time needed cleaning up stars in post. I usually do two row pans with the camera body in portrait position. I usually take 5 to 10 frames across the bottom,and then using the no parallax bracket, I angle the camera up until a trace of the landscape is left. I find that this assists the panoramic software to stitch correctly.
- For the other pan I will change the settings depending upon what I am shooting. I have done multiple exposures at each frame for HDR, if I have to combat lighting. But I usually aim for an ISO around 400 for far less noise, F2.8 to F4 to increase the depth of field and the shutter speed calculated to be equal or near the exposure for the sky so stacking and masking in Photoshop looks correct. As I am not concerned about chromatic aberration in the stars, I do less overlap frame to frame to save time. Using this method the exposure time can get long. I have done 5 minute exposures which gets time-consuming when 5 to 10 frames is needed.
- My processing flow starts with uploading the images into Lightroom, currently using CC. First, I merge any HDR frames. Then I merge each pan (I have only done as many as two pans so far).
- Once the pans are merged, I will do minor processing of the curves highlights, whites, blacks and shadows. Quick and dirty full image processing. I try to keep the two pans’ exposure looking similar. I then select the two images and send them from Lightroom to Photoshop as layers.
- Once they are loaded as layers in Photoshop, I have Photoshop align the two images. There is an auto-align function (which I use) and also an auto-blend function. The auto-blend function hasn’t ever worked for me with night sky imagery as I get a mixture of star trails and pinpoint stars. So I do a manual mask using the sky of one pan and the landscape of the other. If the exposure is drastically different, the image doesn’t look correct. I usually shoot the scene with the exposures calculating the same. But that isn’t always possible such as when shooting the station with lights on. Then it gets tricky to blend. But using the feather function in the mask properties helps greatly.
- I do more mask adjustments in Photoshop with curves, tones, hue/saturation, exposure, etc. It gets pretty long, so I will save the layered work in a folder titled Photoshop working files. This way I can load the layered work up if I want to make any tweaks. Creating the masks is the time-consuming part and being able to save it as a PSD with all layers is worth it, because once the image is flattened to do any tweaks you have to start the process all over again.
A lot my time is spent researching how to process an image. It can be very overwhelming, but as with anything, simply trying will help one learn. Failure happens but is never a complete failure if one learns from it, even if the only thing learned is what didn’t work.
To see more from Josh Swanson, follow him on Viewbug.
